August 30, 2014

Date Night


Date Night.  No, not me, the new bag from Erin Erickson of Dog Under My Desk.  I have been making a lot of Erin's smaller things lately as you well know.  I think I can make the Get Carded wallet and the Zip & Go bag and never even look at the directions anymore.  I was on Pink Chalk Fabrics the other day looking to spend my $25 gift certificate that I won for my second place finish in the Bag of the Month Club with my Poolside Tote, which has gone off to a new home.  I have a harder time picking fabric out online unless I already know what it looks and feels like.  I have been wanting to try out Erin's new Date Night bag so I looked under the PDF patterns on Pink Chalk Fabrics and there it was.  So that is how I spent my gift certificate.  Buying the Date Night pattern and another one of Erin's bags, Bigger On the Inside Drawstring Backpack.

Since I just completed a bag I tested and can't show you yet and am awaiting another one I will be testing, I only have a couple of days in between.  Time to sew Date Night.  Here is a fabric I bought several months ago while visiting friends.  Time to use it.


This bag is a quick sew (except for the zipper).  The zipper has to be hand tacked and then machine basted and then sewn.  But don't try skipping any of the steps.  As you start to machine sew it, you definitely understand why you had to do all of that extra work.    Take your time on this part because it is the toughest part of the bag.  Erin gives great instructions  and gives numerous pictures to show you exactly how to manuever through it.  Oh, and by the way, you have to go back and rip out the hand stitching and the machine basting afterwards because you have to cut out the bulk of the Soft and Stable that is under it all.

Yes, this bag does use Soft and Stable.  It is a small bag (what drew me to it in the first place).  The bag measures 11.5" x 7" x  3.75" when completed, and ....it stands up on its own!


I put a pen in the front pocket in the next picture, so you can see the approximate size.


It is really hard to see the design of the bag because of the busy fabric I used.  The front body of  the bag has 3 pieces (a larger middle piece and 2 smaller end pieces).  The pocket extends across the center piece.  If you look closely, you should be able to make this out on the right side of the bag where the red from my pocket lining ends. You can also see it in the first picture of the fabric.  The back of the bag is one solid piece. 


This bag has a large base that helps it stand up and helps it hold more than you think it should.


I know the bottom has red thread on it....don't you have thread everywhere????  If you don't, please tell me how you do that!

Here is a picture from the side.


And last but not least, the inside with a solid red lining.  There are only slip pockets on the one side.  I think next time, I will put a zipper pocket on the other side.


I love this little bag.  One of my daughters is going to want a bag like this.  She struggles finding bag patterns that are small enough for her. 

I am not a tester for Dog Under My Desk (although I sure wouldn't mind being one), nor do I have any financial ties.  This opinion is my own... check out some Erin's patterns here.  They are fun to make and put together very well.  You'll love the end result!

Oh, and by the way....my daughter just picked out her fabric.  She wants that zipper pocket added and a little piping on the front.  Told you so!


August 26, 2014

Orders Completed and On To Something New


Today, it is on to something new.  I am testing Christine's (from Chris W Design) new bag.  If you go to her website here, you can win the pattern and the hardware to make it.  All you have to do is come up with the winning name.  But, you better hurry, the contest closes Saturday, August 30, 2014.

Before I start that project, though, I wanted to show you the completion of some of my orders.  I say some  because someone in this house I forgot to take a picture of the coffee fabric Zip and Go I delivered yesterday.  Thought I had already taken the picture.  Just goes to show you what happens when hubby is gone fishing and I sew around the clock.

(By the way, Happy 25th Anniversary to my wonderful husband!  They said it wouldn't last and here we are still going strong.  Love you babe!)

I finished the 8 Get Carded wallets by adding the red lips charms.  Thought you might want to see them completed.


I, also, completed a phone pouch for a larger Samsung phone.  This customer wanted a small crossbody bag that was small enough to just hold her phone and maybe a few dollars.  I played with several ideas and tried some free patterns I saw online but when I was not happy with the final result, I went back to a tried but true pattern, the Zip and Go.  I cut this bag to the dimensions I needed and I think it will work fine.


Here is the back.


Just so you can see how far I cut the bag down, here is the regular sized Zip and Go with the phone sized Zip and Go on top of it.


All of the bags shown here today are from Erin Erickson at Dog Under My Desk.  You can find her here.
 
Time to pick out the fabric for Christine's new bag.......
 

August 25, 2014

Around the World Blog Hop


Welcome to the Around the World Blog Hop making a stop today on shades of BOLD.  I was tagged by Daryl of Patchouli Moon Studio to participate today in this blog that is travelling through the blogosphere.  This is a place for you to discover more about me and to find some new blogs that just might make it onto your Bloglovin list.

If you have never been to Daryl's blog , you should really go there.  She works with so many different artistic mediums.  She sews, she quilts, she appliques, she crochets and so on and on and on.  Check out her blog here.

If you don't know much about me, let me fill you in.  I live in Northeast Ohio and sewing is such a passion for me.  I, also, love bags.  They have always been a weakness.  Then the day came that I started making my own and I haven't stopped since then.  I quit my job 2 years ago and making bags is now my "job".  I know...you are feeling really sorry for me aren't you?

Participating in the Around the World Blog requires that we all answer the same questions so here goes.

1.)  What am I working on?

       Normally, I am very structured.  I work on one thing at a time.  I finish that project and then jump right into the next one.  That is not happening now.  I am currently working on three orders at the same time. (I don't recommend this).   Let me tell you about the orders.

While at the festival last week, a young lady came to my space and was looking through things, looking for something.  I asked her if I could help her and she said she was looking for anything with red lips on them.  I knew there was a story there.  Her name was Melissa and she told me the story of her grandmother.
       "My grandma was a very humble woman who was the rock of our entire family. She always put everyone else's needs before hers no matter what. The one thing we all can remember about her is the fact that every year on her birthday she wanted the same thing. To go to dinner at Don Pablo's...and have a margarita. But the one thing you would never see her without when she went out, is her red lipstick. She would even reapply after she ate. ;)
After she died on July 31st, 2006, we decided to start a tradition for her birthday. We would go to dinner every year on her birthday to Don Pablo's, cheer her with a margarita...and you got it...wear red lipstick!!! We all try our hardest to find the coolest "gifts" for each other with red lips on it. We will be celebrating our 9th year Feb 26th, 2015."

                                                           Melissa's Grandmother
 
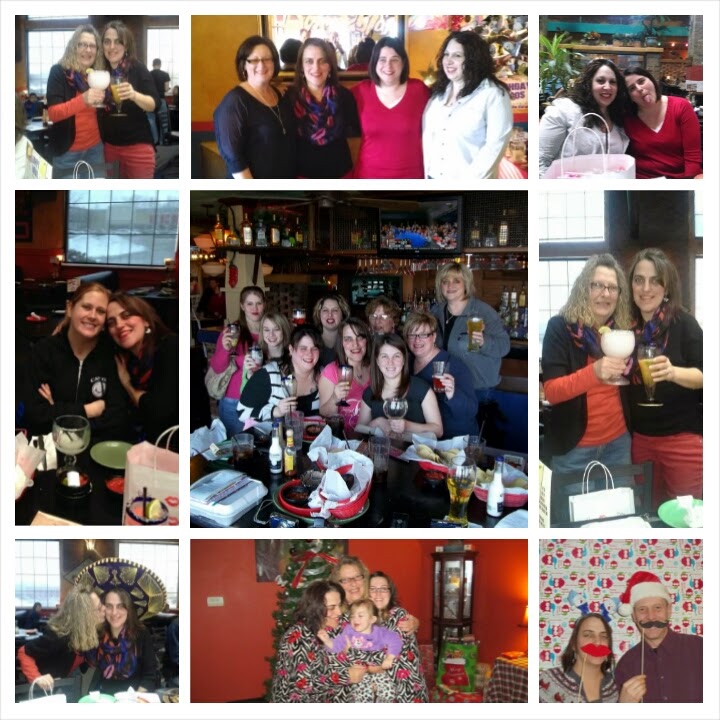
                        Melissa's family celebrating her grandmother's birthday last year.
 
I found this cute red lips fabric and made eight Get Carded wallets from Dog Under My Desk.  You can get the pattern here.
 
 
They are almost done but I found one more thing to add to them as my gift to all of them....
 
A red lips charm that I will attach to all of the zipper pulls.  When I do that, this order will be done.
 
I am also making a Zip and Go Bag from Dog Under My Desk out of coffee themed fabric for my second order and a cross body phone pouch for a large style smart phone.  No pattern I found is exactly right so I am playing around with a paper pattern to combine a few patterns.


2.)  How does my work differ from others of its genre?
 
I use patterns from great independent pattern designers.  I love professional looking bags and I want to see pockets, hardware and design in a bag.  Some of my favorite designers are Christine at Chris W Designs, Janelle at Emmaline Bags, Erin at Dog Under My Desk and Samantha at Sewing With Mrs H.  I also like to play with color.  Putting the right fabrics together can make your bag.


3.)  Why do I create what I do?
 
I love bags!  I love to sew!  It is as simple as that.
 
4.)  How does my creating process work?
 
It depends if I am making something I want to make or if I am making an order.  I follow a customer's preference with some guidance from me when I am making a bag for someone.  When I am choosing the project, I pick the bag first and then I pick fabric.  Fabric has to match the bag style to me.  Certain fabrics will look like a specific bag.  I like to have some bold in there.  If the bag is tame then the lining is bold and vice versa.
 
And now the Around the World Blog Hop goes on.  I have picked two great bloggers to be my tagees for next Monday:
 
Janelle from Emmaline bags is a great independent pattern designer.  She has one of the best wallet patterns of all time...The Necessary Clutch Wallet.  I'm sure many of you have made one.  She also has a good supply of hardware for purchase and some great engraved "handmade" labels.  Her blog is here.
 
Kathy of Running With Rocket describes her blog as a "rambling snapshot of her life".  You never know what you will see here.  One day it is a photo tour of the fair, the next is something she has just sewn.  Not to mention her garden and her love of all things airplanes.  Check her out here.


August 20, 2014

Last Sewing Project Before the Festival


Things got busy last week before the festival and I didn't have a chance to show you the last bag I made before I had to finally quit sewing for a few days.  My hubby does "inventory" on my bags before the holidays and before shows. 

Him:  "You got enough, Bellas?"
Me:  "Only 2 left."
Him:  "Sugar and Spices?"
Me:  "Down to 1."
Him:  "You really think that is going to be enough?"
Me:  "No, but I only have today and tomorrow left to sew."
Him: "You need to have at least one to display for orders."
Me:  "I know, it's not my first rodeo."
Him:  "What happens if someone buys the last Sugar and Spice?"
Me: "Guess I should try to make another one with the time I have left."

So I did and this blog is about that bag.....but it is also about telling my hubby he was right.  I know, I know...it is hard sometimes but I sold what would have been my last Sugar and Spice bag early on in the festival and I would have been Sugar and Spiceless!  Thanks, honey!

Thanks to Christine, too, at Chris W Designs because these two bags continue to be my best sellers.

You can buy the Sugar and Spice pattern here and the Bella pattern here.

Speaking of these 2 patterns, a Bella bag that I made last November or December inspired this Sugar and Spice Bag.  I used the same 2 fabrics on Bella and loved the combo.  I thought it would be just as great on the Sugar and Spice.  Both bags give you that "peek" of the lining and I like it to be a little unexpected.


That's all for today.  I'm working on some orders from the festival and I can't wait to tell you the story behind one of the orders that I am doing.  I'll share that on my Around the World Blog on Monday.

August 18, 2014

The Festival is Over and The Streets Have Been Swept


Today looks like a normal day here but over the weekend......


The streets were humming with vendor set up.  Some set up Friday evening and the rest of us got up earlier to set up Saturday morning.  This is 7 AM Saturday morning before the bulk of the vendors arrived.  What a glorious day...cool in the morning for set up but 79 degrees by noon.  Perfect!  The streets to the downtown area are all closed to traffic from Friday at 6 PM until Sunday at 6 PM for this wonderful yearly festival.  So much for everyone to do...face painting and rides for the kids, basket ball shooting for the teens with representatives from the Cleveland Cavaliers our local pro basketball team, and even a pooch parade on Saturday with the area's  dogs dressed in their finest to strut their stuff down the street.  My favorite was a little dog with a denim ball cap on with holes cut out for his ears.  There was also a "family" of shelties that grabbed everyone's attention.  The "dad" was strolling 5 shelties in a large stroller and the "mom" was strolling 2 more in another stroller.  They ranged in ages from 2 years to 11 years.  They were sitting back and enjoying the ride and all of the attention they were receiving.


Starting to get my booth in shape.  Love the banner my hubby bought me for Christmas to drape over my tablecloth!  I met so many wonderful people (including my vendor neighbors), sold a fair number of bags, took several orders for more and had a great time.  Our booths were open until 8 PM.  It was a very long day. 


The community and surrounding communities sure supported the event, especially on Saturday.  This was when the crowd was still small enough to have the time to take pictures.


It rained overnight, started out cool and drizzling on Sunday AM but by the time the festival started at 11 AM, the weather cleared and we had another great day!  That is the risk of outside shows...you just never know!  Not as many people as we had on Saturday but more as the day progressed.  The booths closed at 5 PM.  The vendors tore down and packed up.  The street cleaners came at 6 PM  and the streets reopened shortly thereafter.  It looked like nothing had ever happened, but we all know that this festival marks the end of summer in our community because school starts for all of the kids this week !!!!

Now, back to work...I have orders to fill and some fabric to search for........

August 13, 2014

Getting Ready For the Festival by Getting Carded


Well, The Main Street Festival in my town is this weekend.  I'm trying to increase some of my smaller items and have been sewing nonstop.  I've been wanting to try one of Dog Under My Desk's Erin Erickson's newest patterns, Get Carded, and thought this would be a great way to finally get to this pattern and to increase my smaller items at the same time.

Get Carded is a small ID wallet on a wristlet strap.  You can get the pattern here but be careful, it is addicting!  I have made smaller ID wallets before but they were so bulky and hard to sew and turn inside out that I dreaded when someone asked for one...no longer...Erin says she reduces all of the bulk and does she ever!  It is so slick the way it goes together and it comes with three variations of the front.  I loved the look of the gathered front and used this one exclusively.  This pattern can be made with two fat quarters, one for the outside and strap and one for the inside.


Here are some up close looks at the Get Carded wallets I made this past week:


and this one that didn't make the first picture because it was sold immediately off my sewing machine...still warm!


The inside of this wallet has 5 pockets.


The back has a clear vinyl pocket for your ID. (Love the mini owls looking at you!)


Some things I changed and other things I recommend:

  • If you are going to make one, you might as well make two. Many of the pattern pieces are cut individually. It is just as easy to double the fabric and cut two! (See, I told you I was addicted...this is how it started).
  • When I made ID wallets in the past, I made lanyards for them because many college and high school girls were wearing these around their necks. I decided to make a lanyard and a wrist strap for each of them so whoever buys these will have their choice. (You have enough fabric left over in your fat quarter to make a lanyard).
  • The one thing I didn't like about this pattern was how she put the wristlet strap together. For a long time, I have used a pattern by MsElaineous for Loopy lanyards. I like how this strap goes together and I use it for wristlet straps as well. You can get this pattern for free here.
  • After the first Get Carded I made, I switched from a D ring to a split ring so that keys could be easily threaded onto it to make them handy to carry.

Making two straps per wallet equals a lot of strap making this week!  These twenty-two and the two others that left with the ID wallet that sold.


Back to sewing...I've only got a few more days to make more bags.........

August 11, 2014

Motorcycle Bag In Flames


Every once in a while, I'll get an order for a bag that is different, unusual, one that can't be purchased from any department store.  This is so very fun for me.  Usually the customer has been looking for awhile and gets so excited that they may actually get the bag they have been searching for.  Remember the "skull wallet"?  You can see that here.  I actually made two of them when the original customer had a friend that saw hers and wanted one, too.  I usually make one of a kind bags but with both of their permission, I made a second one.

I just completed another order unlike anything else I had done.  This customer loves motorcycles and has a Harley Davidson herself.  She had been looking for a motorcycle bag in orange and black and thought flames would be great.  She chose the Convertible Bag by Samantha at Sewing Patterns by  Mrs H.  You can buy this pattern here.  She thought it would be great because she could wear it as a crossbody bag but could also convert it to a backpack when she wanted.

I completed this bag this weekend.  She has not seen it yet and I hope she will love it!

I found two different kinds of flame fabric but thought this one was the most dramatic.    I loved the thin blue outline on the flames.  I combined it with a black faux leather and kept the inside of the bag a lighter, brighter color (yellow-orange) to make it easy to find things inside.  Here are the fabrics.


Are you ready for the finished bag???


I actually really love it!!  Here is the back of the bag as a crossbody with adjustible straps.


Here is the back converted to a backpack.


Last but not least is the interior.  I wanted a lighter, brighter fabric because the outside is dark.  It is also hard to find things in a bag when the lining is too dark.


Hope she loves it!!!

August 4, 2014

When One Isn't Enough


I just loved the first Stow It All Tote I made from a pattern by Christine at Chris W Designs.  You can see it here.  I knew that I wanted to make another one soon but have been busy with other projects.  I finally found the time.

The one thing I liked about my first bag was the use of prequilted fabric as the solid colored fabric.  I decided to keep that component on this bag (you see, unlike many of you, I don't quilt).  I used black last time but chose a chocolate brown this time.  I have always liked brown and pink or brown and turquoise together and was lucky enough to find a brown, pink and white home dec fabric and combined those two fabrics with a pink quilting cotton with small white polka dots.  Here it is.

I left the pocket on the back of the bag as one large pocket so a tablet could fit there.


The bottom of this bag has bag feet.  I chose larger ones since this a good sized bag.

 
I love the way the lining fabric forms a trim on the top of the bag, top of the outside pockets and top of the inside slip pocket.  It looks like binding but it's not.  It's super simple to do.


The bag closes with a recessed zipper closure.


I love this bag so much.  It is made with by Annie Soft and Stable.  This foam product provides for a firm but soft support.  This bag stands up very well on its own.
 
I'm sure there will be a third bag somewhere down the line.  Probably more!!!  No, definitely more!!!

Convertible/Reversible Bag Tour Winners

Thanks to everyone that visited all of the blogs for the week long Convertible/Reversible Bag Tour.  It was such fun to see how different all of the bags looked.  Same pattern but all so different!  Thanks, Sarah, at Cozy Nest Design for such an ingenious pattern to work with.  Buy it here.


The drawings are over and here are the lucky daily winners:


Monday: Lori M.
Tues: Dee Dee F.
Wed: Ruth-Dawn G.
Thurs: Jennifer H.
Friday: Debi J.

Congrats to all!  Sarah should have emailed you by now.  Enjoy your winnings.  What great prizes Sarah gathered for this bag tour.